


Local by default.
Captures and baselines stay in your project as plain images and JSON. No telemetry.
OPEN SOURCE. ON YOUR MACHINE.
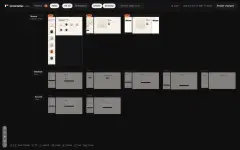
Your whole web app, in the order people use it.
See what changed.
Keep the rest in view.
The actual viewer. Exported read-only with
screenatlas export. Your own app stays on your machine.
That badge reaches 13 of 22 steps.
Screenatlas follows your imports to find them.
export function Badge({ children }) {
  return (
−   <span className="badge">
+   <span className="badge badge-new">
  );
}23 of the 26 retaken shots changed. Review them against the baseline you accepted, biggest change first.
Every picture is the Screenatlas viewer,
taken by the script
that builds this page.
Before-and-after crops, readable screens, and browser errors.
The same picture for you and your coding agent.
Install the plugin in your app’s project. Your agent can set up journeys, capture changes, and review the screens it affected.
codex plugin marketplace add TomasSestak/screenatlas
codex
                plugin add screenatlas@screenatlas
Install Screenatlas in your app first. Start a new agent session after adding the plugin.
Read the agent setup guideYour running app. Your test data. Your machine.
Captures and baselines stay in your project as plain images and JSON. No telemetry.
Catch invisible text, sideways scrolling, broken media, and failed requests.
Pages, dialogs, empty states, and form errors sit in the order users meet them.
Export a read-only atlas to a static host, or use the GitHub Action for PR reviews.
Next.js · TanStack · React Router · SvelteKit · Astro · Nuxt · Expo web
Any web app works. See the route adapters ↗
Start in your app’s directory.
Your first capture becomes your
baseline.
Find your routes and write a starter config.
Every step, on phone and desktop.
Keep it open. Live mode follows your saves.
bun add -d screenatlas playwright
bunx playwright install chromium
bunx screenatlas init
bunx screenatlas capture
bunx screenatlas serveNode 22+ · Playwright Chromium · A running web app
Screenatlas captures anything that runs in a browser. Built-in adapters add route discovery and change detection for Next.js, React Router, SvelteKit, Astro, Nuxt, TanStack Router and Expo Router web. Other apps can use a file map.
No. The viewer on this page is the real Screenatlas viewer,
exported read-only with screenatlas export, showing
the demo shop in the repository. Install Screenatlas in your own
project to capture your app and review its changes.
The init command finds routes and writes one starter step per page. Add Playwright actions for states such as open dialogs, validation errors and signed-in views. Your app needs repeatable test data.
Screenatlas follows an edited file through the import graph to the routes that render it, then retakes the steps on those routes. Global styles and other files outside the graph can use explicit change rules.
Screenatlas captures web apps in Chromium at phone and desktop viewport sizes. Expo Router web is supported; native iOS and Android screens are outside its scope.
Screenatlas is free and open source under the MIT license. Install it as a development dependency and run it on your machine.
Free. Open source. On your machine.